Marine Battery Charging - All You Need to Know

Marine Battery Charging Guide: Key Takeaways for Maximizing Battery Life
- Optimal Discharge Limits: To maximize efficiency and prevent capacity damage, keep your marine battery's level of discharge limited to between 50% and 80% of its stated capacity.
- Smart Chargers Prevent Damage: Modern 'smart' chargers are critical because they match your battery's voltage (12V, 24V, 36V, or 48V) and utilize the correct chemistry-specific profile (Lead Acid, Gel, AGM, or Lithium) to avoid overcharging.
- The 3-Stage Charging Process: Non-lithium marine batteries rely on a 3-stage profile: Bulk (maximum current up to ~75-80%), Absorption (tapered current topping off to ~90-95%), and Float (low voltage maintaining 100% safely).
- Lithium Battery Efficiency: LiFePo4 (Lithium Iron Phosphate) batteries are highly efficient; they skip the Absorption phase completely and stay in Bulk charging until about 95% full, preferring not to be charged to a full 100%.
- Preventing Overcharging & Heat: Overcharging degrades performance and shortens battery lifespan. High-quality smart chargers use temperature sensors to fine-tune cycles and prevent dangerous loops like 'thermal runaway'.
- Voltage Reflects State of Charge: You can gauge your battery bank's capacity using resting voltage metrics. For example, a standard 12V Lead Acid battery is 100% charged at 12.70V and 0% charged at 11.80V.
- Sizing Chargers & Alternators: A boat's battery charger output should ideally range between 10% and 25% of the total amp-hour bank capacity. Alternators should similarly match the bank's maximum charge acceptance rate to avoid engine overload.
- Multi-Stage Regulators for Anchoring: Standard engine alternators cannot charge using a proper 3-stage profile without an external multi-stage regulator. Upgrading to a smart regulator protects your bank from overcharging while away from shore power.
- Crucial Maintenance Do's & Don'ts: Always keep terminals clean and ensure proper compartment ventilation. Never combine old and new batteries, never undercharge (which causes permanent sulfation resistance), and don't let electrolyte levels drop below the plates on flooded units.
How low is too low?
No one likes spending a lot of time charging their batteries – but it's important to understand how low we can go (discharge wise) between charges without damaging our battery bank. The first thing to understand is that the more “discharged” a battery is, the higher the charge current it will accept during recharge.
With that in mind, it would seem like we should take the battery state of charge as low as possible, right? But that's definitely not a good idea because discharging most batteries by more than 50% will reduce their capacity and shorten their life over time. In addition, even though it will accept a higher charge current when it's more depleted, the lower the discharge, the longer you will have to charge to get that battery back up to full capacity.
So how low is too low? Most people agree that for greatest efficiency you should try to limit your level of discharge to somewhere between 50-80% of the stated capacity.
Charging the Battery Bank
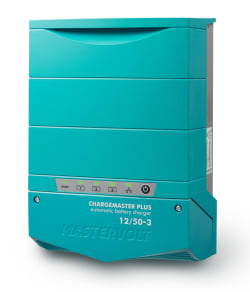
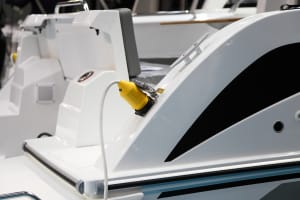
You've come back to the dock after a great weekend out and are ready to plug into shore power and completely forget about your batteries. If you've got a “smart” charger – that's perfectly fine as it will do all the hard work for you. But if you don't – and you want to protect your expensive batteries – it's time you understood why the type of charger you choose for charging is important.
The most important considerations when you purchase a charger is that it has the correct voltage to match your batteries (12V, 24V, 36V, or 48V) and can be programmed for your specific battery type (lead acid, gel, AGM or lithium batteries). Most modern chargers allow you to select the type, ensuring that the correct charge profile for your battery's chemistry is used to get back to a fully charged battery.
Diving into Charger Profiles - How to Charge a Marine Battery Correctly
All batteries come with specific charge profiles determined by the manufacturer and battery type to give it the longest cycle life possible. Modern chargers are created with basic charge profiles for each battery type, but will often also give you some flexibility to change the settings. Below are the 3 main steps of charging all batteries except LiFePo4 batteries. To help you understand how marine battery charging works, try to imagine how many people you can fit into a specific room and now we'll tell you how that relates to each phase of charging below.
Step 1: Bulk – During this stage your charger is putting the maximum amount of current that it can safely deliver into your system. So in our analogy, a bunch of people can just rush into the room without much thought of how to fill the space efficiently - it's just about filling the space as quickly as possible. During Bulk charging, the charger will deliver a high level of charge current for a period of time until your batteries are at approximately 75-80% of their full charge. Since you've told your onboard charger what type of batteries you have, it knows the amount of charge current that is “safe” to deliver. Without this feature, the charger can potentially deliver too much current, which can cause the batteries to overheat and/or cause excessive gassing – creating a dangerous situation in addition to reducing the overall service life.
Step 2: Absorption – During this stage, it's like you are now moving people around slightly to fit another 10-15% more people into the room. It's can take some time, but you know you can fit quite a few more people. With batteries, at this stage of the charging process, the easily accessible surfaces of the battery plates have been charged and your smart charger will taper the current down to allow time for the charging current to reach the interior portions of the plates for an even deeper charge. This is considered the “topping off” phase of charging and at the end of this step the batteries should be at 90-95% of their full charge state.
Step 3: Float – Lastly, if we organize everyone in the room extremely carefully, we can maybe fit 3-4 more people in, but it can take a long time to organize. During the float stage, the charger will drop the voltage back, ensuring the batteries return to 100% full charge without pushing too much current in. Depending on the battery type, this process can take hours. Once your batteries are at 100%, the charger can remain in this stage (keeping the batteries fully charged) for long periods of time with no harmful effects to the batteries due to overcharging.
Unlike all other battery types, lithium ion phosphate (LiFePo4 or LFP) batteries can skip the Absorption phase completely and just stay in the Bulk phase until they are about 95% charged. Since they actually prefer NOT to be charged to 100%, the one step is all they really need. For more information, read The Power of LIthium Batteries
Can you overcharge a marine battery?
Yes - you absolutely can, which is why a boat’s batteries should not be charged at a rate higher than specified by their manufacturer – referred to as their charge profile. Doing so may decrease performance over time, shortening the functional life. Some manufacturers of higher quality batteries, such as MasterVolt and Lifeline, actually put capacity and recommended bulk, absorption, and float voltages right on the unit itself - so make sure to set up your charger according to those numbers.
In addition to using the stages above, many modern chargers will include a temperature sensor in order to fine tune the charge cycle and make sure your batteries receive the maximum fast charging amount without overheating. Doesn't that sound like a good investment? If you are worried about the cost involved, just remember that a good charger can easily pay for itself in fewer battery purchases over the years.
Marine Battery Voltage Chart and Guidelines
If you don't have one of the fancy new battery monitors on the market, it's helpful to know that you can also tell the approximate state of your battery by looking at the voltage. The following chart gives an idea of approximate voltage at various percentages for each type of battery - based on a 12V bank in a resting state. As you can see, while lower voltages are similar, higher voltages can vary and LiFePo4 voltages are completely different that other battery types.
| Percentage | Lead Acid | Gel | AGM | LiFePo4 |
|---|---|---|---|---|
| 100% Charged | 12.70 Volts | 12.85 Volts | 12.80 Volts | 13.33 Volts |
| 75% Charged | 12.40 Volts | 12.65 Volts | 12.60 Volts | 13.32 Volts |
| 50% Charged | 12.20 Volts | 12.35 Volts | 12.30 Volts | 13.18 Volts |
| 25% Charged | 12.00 Volts | 12.00 Volts | 12.00 Volts | 13.08 Volts |
| 0% Charged | 11.80 Volts | 11.80 Volts | 11.80 Volts | 10.00 Volts |
Is Bigger Better with Boat Battery Charging?
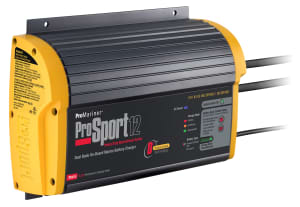
Battery chargers are available from a multitude of manufacturers and come with varying output voltages – so how do you know which one to buy? The smallest chargers on the market will charge at a maximum of 10 amps - so if you need to recover 100 amps, it could take more than 10 hours to do so. Some of the largest chargers can deliver over 100 amps, so it would be much quicker to recover that same 100 amps. Opinions vary on how big a charger you need for your bank and a lot will depend on exactly how you use your boat.
If you normally go out for a weekend and then return to the dock, regularly plugging into the shore power connection, you can likely get away with a smaller charger. That said, at a minimum it needs to be big enough to handle the loads you'll be putting on your electrical system while you're gone (DC refrigeration often being the biggest load) while still being able to to maintain the charge level of your batteries.
Conversely, if you cruise for longer periods without plugging in (say several weeks at a time) you should consider buying a charger where the maximum output current most closely matches the charge acceptance rate for your type of batteries/Ah rating. This ensures the fastest and most efficient charge possible while still safely charging your batteries. For more information on Charge Acceptance, read Sizing Your Battery Bank
Overall, most manufacturers recommend somewhere between 10-25% of your bank's amp hour capacity as a good gauge of battery amperage output for those of us who don't stray from a dock for too long. So if you have a 400 amp hour bank, you should have a charger with an output voltage somewhere in the 40-100 amp range. Fisheries Supply carries all the best manufacturers, including Victron Energy, Guest, Mastervolt, Newmar, Pro Mariner and Xantrex.
What about charging with an alternator when I'm at anchor?
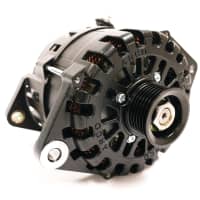
Now that we know how to charge at the dock, what happens when you're out at anchor, using your engine to recharge your batteries? Unless you have a generator, this is where engine and your alternator come in.
Every boat will have a different ability to charge, based on what type of alternator it has and how it's set up (with or without an external regulator). Alternators come in a variety of amp hour outputs, so make sure you know what the output is for the one you have installed. If you are looking to change out your alternator for something bigger, make sure it's ability doesn't exceed what your battery bank can handle or you'll just be wasting energy.
If you've done your homework and understand charge acceptance rules, you'll know that a larger battery bank can accept a higher charge voltage – so make sure your alternator is sized appropriately for your bank.
For example, let's say your alternator has the ability to charge at 120 amps. If your battery bank consists of just one flooded 8D battery (rated at 220 Ah), it can only accept up to 55 amps of charge – so that alternator would be considered overkill for what you need. Conversely, if your battery bank consists of 3 flooded 8D batteries (660 Ah), they are capable of accepting 165 amps per hour and so can put the full 120 amps your alternator provides into recharging – much smarter!
A Side Note on Alternator Upgrades
While selecting a battery charger for charging at the dock is reasonably straightforward, upgrading an alternator is a bit more complicated. Choosing an alternator that puts out a lot of power can be great if you have lithium batteries that can accept all that power, but if you don't - you may be putting undue load on your engine. This process takes serious planning and an excellent understanding of your engine and belt drives – so unless you know what you're doing, consulting with a professional is highly recommended.
But the output of the alternator is not the only thing you need to worry about. As we learned earlier – batteries last longer when they are charged using a 3-stage (Bulk/Acceptance/Float) profile – but the majority of alternators are not capable of charging like this unless they are installed in conjunction with some sort of regulator. Without a regulator, the alternator is just putting in its standard charge voltage – which we've already learned is not the best method and can easily lead to overcharging and/or overheated batteries.
Many modern boats have been updated to include some sort of external regulator to avoid this issue. But if your boat hasn't, the best option is to use a multi-stage regulator – which allows you to not only specify your battery type, but will also enable the alternator to vary the charge voltage, keeping it within the 3-step charge profile we outlined previously – just like a smart charger. Depending on the one you choose, it may even be able to monitor your battery's temperature and level of discharge, allowing it to charge as rapidly (but safely) as possible. Some of them even come with Bluetooth, allowing you to monitor exactly what's happening with an app - great for troubleshooting if you're having issues.
Do's and Don'ts for a Boater to Consider During AC/DC Marine Battery Charging
Now that we've covered charging at the dock or at anchor, we'd like to go over a few additional reminders to prolong your batteries' life:
- Do check the battery terminals to make sure they are clean and corrosion free before starting to charge.
- Do make sure your batteries are fully charged at least once a month for longer battery life.
- Do make sure your battery compartment has sufficient ventilation per manufacturer recommendations.
- Don't let your battery sit for too long in a discharged state without being recharged as severe sulfation can occur, causing permanent damage.
- Don't let the electrolyte level fall below the plates if you have flooded batteries. This causes damage through sulfation to the exposed portion of the plate, which reduces capacity over time.
- Don't combine older batteries with new ones. The performance of the new battery will be drastically reduced by doing so.
- Don't undercharge your batteries. If done repeatedly, this can lead to sulfation which hardens on the plate, decreasing their performance over time due to increased resistance. To make matters worse, increased resistance fools your charger into thinking the battery voltage is higher than it is, which means it will stop charging earlier than it should – making the problem increasingly worse over time.
- Don't overcharge your batteries – which can boil the electrolyte and cause overheating or even “thermal runaway”. When a battery is hot it can take a higher rate of current, which can cause it to heat up even more. This loop can quickly get out of control (thermal runaway), destroying a battery in as little as a few hours with potentially major repercussions.
How much charging time will it take for a deep cycle marine battery to be fully charged, but not overcharged?

The answer completely depends on the type of battery, its charge efficiency and how depleted the bank is. It also depends on what you are charging it with. Let's say you have a battery bank of flooded lead acid batteries for total of 480 amps and you have depleted 100 amps from it. Using a moderately sized charger that can put in 40 amps per hour, and assuming a charge efficiency of 0.85%, it should take you approximately just under 3 hours to recoup those 100 amp hours. However, using an alternator that's capable of putting in 100 amps, it will take just over 1 hour of charging to recoup the same amount. Due to the level of depletion and the charge acceptance rate of the batteries, the alternator will charge much faster than the charger.
How can you tell if you have a fully charged battery?
There are many ways to monitor how charged your battery is. One might be to see what stage your charger is showing - if it's in float mode, it's very likely about 100% charged. Or you can look at your resting voltage - and then compare it to the voltages in the table mentioned earlier in this article. Or you can buy one of the many battery monitoring devices which will tell you approximately how many amps you've used and what percentage your battery bank is at - some of which even report to an app on your phone - very handy!
Is charging a marine battery with solar panels something I can do?
Absolutely! Using renewable solar energy is something many cruisers who rarely dock their boats use to charge their batteries. While it takes some investment up front, what's better than free energy? That said, it's important to make sure you set up a solar system appropriately so that your batteries do not overcharge, so make sure you do your homework or consult with an expert in solar installations on boats.
Can solar energy be used to trickle charge my battery?
Yes - solar energy is an excellent way to trickle charge your batteries if you have your boat on a mooring and do not have access to shore power, but make sure you are also using the appropriate charge controller/MPPT configurations to prevent overcharging.
We hope the information in this article will help you get the best performance out of your battery bank – but if you have further questions, please don't hesitate to call our battery experts at (800) 426-6930.