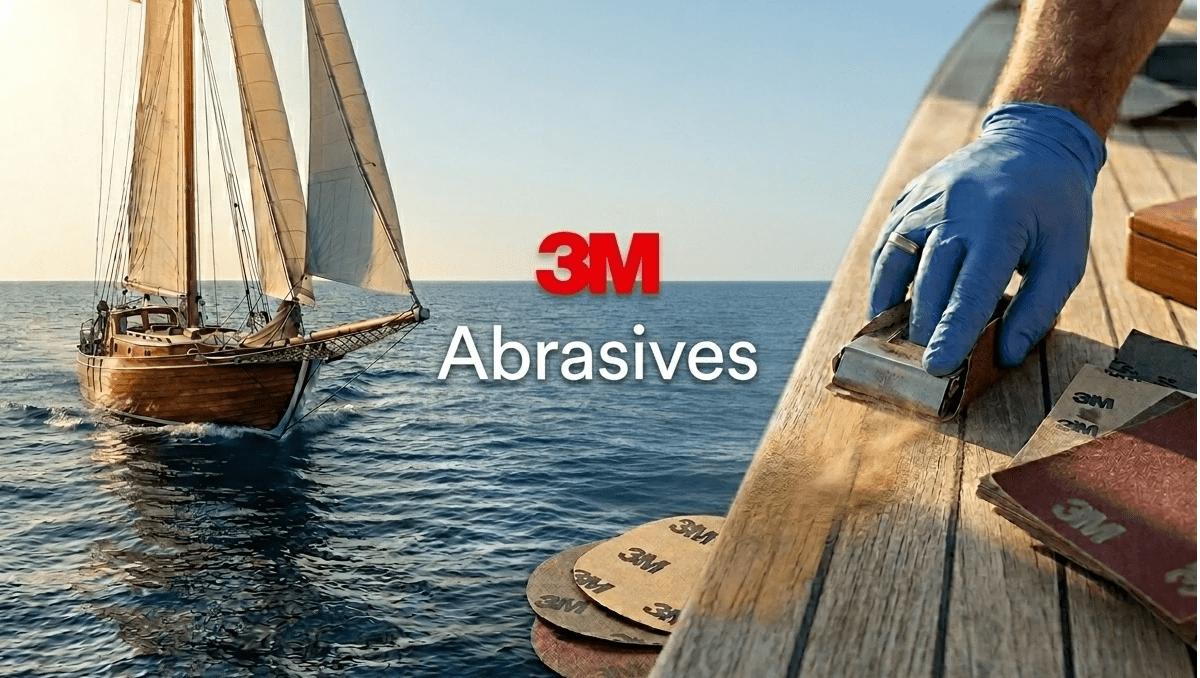
The Complete Guide to 3M Abrasives for Boat Sanding

A Tale from the Dock: Last summer, I watched a fellow boat owner spend three times longer than necessary sanding his 32-foot cruiser's bottom because he'd grabbed the cheapest abrasives he could find. By the time he switched to proper 3M Cubitron II discs, he'd already burned through a weekend and his enthusiasm. Don't be that guy.
Key Highlights of 3M Marine Abrasives
- Quality Matter: 3M uses a "Good, Better, Best, Premium" system, where higher-tier abrasives can complete jobs in half the time and last twice as long as basic options.
- Match Mineral to Material: Use Silicon Carbide for wet sanding fiberglass and gelcoat due to its self-sharpening properties. Use Aluminum Oxide for general woodwork and metal maintenance.
- Cubitron II Advantage: For professional-grade efficiency, Cubitron II precision-shaped ceramic grains cut faster and run cooler.
- Follow a Progressive Grit Strategy: Start with coarse abrasives for imperfections and progress through 400 grit for finishing; always clean the surface between grit changes.
- Dust Extraction: 3M's Clean Sanding technology uses strategic hole patterns to increase disc life and ensure a higher-quality finish.
- Hand vs. Machine: Use orbital sanders for large surfaces to minimize swirl marks, but stick to hand sanding for intricate areas where tactile feedback and pressure control are necessary.
Understanding 3M's Abrasive Universe: From Good to Game-Changing

With so many different types of abrasives, the beauty of 3M's approach lies in their Good, Better, Best, and Premium categorization system. While it might seem like marketing speak, there's real science behind it. The more you invest upfront, the more time you'll save on the water, and isn't that where you'd rather be?
Cost-Efficiency: Premium abrasives often cost 2-3 times more than basic options, but they can complete jobs in half the time while lasting twice as long. Do the math, your time has value too.
The Complete 3M Abrasive Lineup: Choosing Your Weapons
| Series | Grade | Abrasive Material | Key Features | Best Marine Applications |
|---|---|---|---|---|
| 200 Series | Good | Aluminum oxide (basic) | General purpose, economy option; sharp particles that wear quickly | Small touch-ups, budget-friendly boat maintenance |
| 300 Series | Better | Premium aluminum oxide | Superior particle sorting; longer-lasting than 200 Series | Extended sanding projects, hull refinishing |
| 400 Series | Better | Silicon carbide | Self-sharpening particles; excellent for wet sanding applications | Fiberglass work, wet sanding, low-heat applications |
| 500 Series | Better | Alumina zirconia | Exceptional on metal surfaces; bridge to 900 Series performance | Propeller work, metal hardware, stainless steel |
| 700 Series | Best | Natural aluminum oxide & Cubitron ceramic blend | High-performance hybrid for demanding applications | Challenging marine surfaces, professional refinishing |
| 900 Series (985, 977, 988) | Best | Pure synthetic Cubitron | Hardest, longest-lasting; handles high heat and tough metals | Heavy-duty metalwork, cold rolled steel, high-stress applications |
| 900 Series (982, 984, 987) | Premium | 3M Cubitron II (precision-shaped ceramic grain) | Ultra-sharp, fast-cutting, runs cool, consistent performance | Professional marine work, maximum efficiency, heat-sensitive materials |
| 1000 to 2500 Wetordry™ | Premium | Typically made with silicon carbide mineral on waterproof paper | Engineered for superior performance in both wet and dry sanding applications. | Used for leveling orange peel or smoothing clear coats before final buffing and polishing |
The Silicon Carbide Sweet Spot for Fiberglass

Technical Insight: Silicon carbide particles naturally fracture during use, constantly exposing fresh, sharp cutting edges. This self-sharpening property makes them ideal for fiberglass work where consistent cutting action is crucial.
When to Choose Cubitron vs. Aluminum Oxide
The eternal question: traditional aluminum oxide or modern Cubitron ceramic? Here's the real-world breakdown:
Aluminum oxide remains the go-to choice for general boat maintenance. It's sharp, affordable, and gets the job done for most DIY projects. Think of it as your reliable daily driver, not flashy, but dependable.

Cubitron II ceramic grain, on the other hand, is the Cadillac of abrasives. These precision-shaped particles cut faster, last longer, and run cooler than traditional materials. The Cubitron II technology in the premium 900 Series represents the pinnacle of abrasive engineering.
Real-World Example: A professional boatyard recently switched from aluminum oxide to Cubitron II for its hull refinishing work. They reported completing jobs 40% faster while using 60% fewer discs. The initial cost increase was offset within the first month through improved efficiency and reduced material waste.
The Science Behind the Backing: More Than Just Sticky Stuff
While everyone focuses on the abrasive medium, the backing system often determines the success of the job. 3M offers two different types of options for different working styles:
- Hookit™ System: This is a hook-and-loop (Velcro-style) attachment that makes it easy to quickly change discs, reuse partially used abrasives, and adjust as you go. It's perfect for jobs where flexibility and frequent disc changes are needed, such as detailed work or when experimenting with different grits.
- Stikit™ System: This uses a pressure-sensitive adhesive backing that securely sticks the abrasive to the pad. It's ideal for high-production environments or when you want a firm, no-slip grip, just peel and stick for fast, efficient sanding.
Pro Quick Tip: Hookit™ systems excel because they allow you to remove and reposition discs without losing adhesion.
Matching Backings to Marine Challenges
Now that you understand the difference between how to attach the abrasives, let's talk a little bit about why the backing material is every bit as important as the abrasive itself. The backing material isn't just about holding abrasive particles, it's about surviving the marine environment while delivering consistent performance.
| Abrasive Backing Material | Key Features | Best Applications |
|---|---|---|
| Paper (A-weight to F-weight) | Lightweight, cost-effective, available in various thicknesses; not suitable for wet conditions | General sanding, woodworking, finishing tasks |
| Film (Mylar) | Superior tear resistance, waterproof, provides flat and consistent finish | Marine sanding, wet sanding, automotive refinishing, fine finishing |
| Cloth Fabric | Flexible, highly durable, conforms to curves and contours, long-lasting | Belt sanders, metal finishing, sanding curved or irregular surfaces |
| Resin-Reinforced Fiber | Exceptional heat resistance, designed for high-speed, heavy-duty grinding | Grinding discs, metal fabrication, weld removal, heavy stock removal |
Mastering Fiberglass: Techniques That Actually Work
Working with fiberglass requires finesse, not force. Here's the approach that separates professionals from DIYers:
The Progressive Grit Strategy
Start coarse, finish fine, but know when to make the jump for finishing. Begin with 80-120 grit for major imperfections, then progress through 220, 320, and 400 grit for final finishing. Skip steps and you'll create more work for yourself.
Pro Technique: Always sand in the direction of the hull's natural lines, or you'll create scratches that telegraph through primer and paint, haunting you for years to come.
The Clean Surface Protocol
Between each grit change, clean the surface thoroughly. Use a tack cloth or compressed air to remove all sanding residue. This simple step prevents contamination and ensures each successive grit can do its job effectively.
Hard-Learned Lesson: I once skipped the cleaning step between 220 and 320 grit while refinishing a transom. The contaminated surface created an uneven finish that required starting over from 180 grit. Twenty minutes of cleanup could have saved me four hours of rework.
Application-Specific Sanding Considerations

When it comes to boat sanding, one size does not fit all. Different surfaces and materials present unique challenges that require tailored approaches. For instance, when working on fiberglass hulls, you should prioritize using silicon carbide abrasives for their water-resistant properties and self-sharpening characteristics. Conversely, aluminum oxide is an excellent choice for general woodwork, fiberglass, and ferrous metal (steel and iron) applications, offering versatility and cost-effectiveness. Always consider the specific material and the desired finish to select the most appropriate abrasive for the job.
Sanding techniques also vary based on the application. For detailed work, hand sanding or using sandpaper may provide more control, while larger surfaces benefit from the efficiency of machine sanding. Understanding these distinctions and considering the pros and cons will empower you to achieve optimal results to match your specific boat maintenance needs.
Sanding By Hand vs. Machine: What You Need to Know

Deciding between hand sanding and machine sanding can significantly impact the outcome of your project. Hand sanding offers greater control and is often preferred for intricate areas, allowing you to feel the workpiece and adjust pressure as needed. However, it can be labor-intensive and time-consuming. For larger surfaces or heavy material removal, powered options like orbital sanders or random orbital sanders, which come in a variety of sizes, are more effective. These machines can save you time and effort, especially with the right abrasive discs.
When using an orbital sander, consider the type of sanding disc that best fits your needs. Random orbital sanders are versatile and minimize swirl marks, making them an ideal choice for achieving a smooth finish on gelcoat or fiberglass. While hand sanding provides precision, the efficiency of an electric sander can speed up the process without sacrificing quality. Ultimately, the choice will depend on your specific project requirements and personal preference.
The Clean Sanding Revolution: Why Holes Matter
3M's Clean Sanding technology isn't just about keeping your workspace tidy, it's about disc longevity and achieving high-quality finishes with less pressure. The strategic hole patterns allow superior dust extraction, preventing the clogging that kills abrasive performance.
Dust Extraction: Clean Sanding discs can extend usable life by 200-300% compared to solid discs in high-dust applications. The oversized hole variants are specifically designed for aggressive material removal, like bottom paint stripping.
Heat Management
Excessive heat during sanding can damage gelcoat coating, warp fiberglass, and create finish problems that won't show up until after you've applied primer. Cubitron II abrasives run significantly cooler than traditional materials, making them invaluable for heat-sensitive marine surfaces.
Heat Prevention Tips:
- Keep your sander moving, never park in one spot.
- Use appropriate pressure, let the abrasive do the work.
- Consider wet sanding when appropriate.
- Take breaks to let both tool and surface cool off.
The Future of Marine Abrasives: What's Next?

3M continues pushing the boundaries of abrasive technology. The precision-shaped ceramic grain in Cubitron II represents just the beginning for various applications, especially for grinding stainless steel and removing surface contaminants. Future developments promise even more efficient material removal with reduced environmental impact.
Looking Ahead: Until then, understanding and properly applying current technology remains your best strategy for efficient boat maintenance.
Your Next Steps: Putting Knowledge into Action
The difference between frustration and satisfaction in boat maintenance often comes down to using the right abrasive for the specific task at hand. Whether you're dealing with stubborn bottom paint, refining gelcoat repairs, or preparing surfaces for a new finish, 3M's comprehensive abrasive lineup provides solutions for every marine application, ensuring durability in performance.
Remember: The most expensive coated abrasive isn't always the best choice, but the wrong abrasive is always the most expensive in the long run. Consider your project scope, time constraints, and finish requirements when making your selection.
Final Pro Tip: Start with small quantities of premium abrasives to test their performance on your specific materials and applications. Once you experience the difference, you'll never want to go back to basic options for important projects.
Your boat deserves the best care you can provide. With the right 3M abrasives and proper technique, you can achieve professional results that protect your investment and keep you proud of your vessel for years to come.
How to Avoid and Fix Swirl Marks from Orbital Sanders
Swirl marks can be a frustrating byproduct of using orbital sanders, especially on visible surfaces like boat hulls and decks. These unsightly imperfections are often the result of improper technique or incorrect abrasive selection. To avoid swirl marks, a quick tip is to ensure you're using the right grit for the job, start with coarser grits for heavy material removal, then transition to finer grits for finishing.
If you find yourself faced with swirl marks after sanding, don't despair. You can fix these imperfections by lightly sanding the affected area with a finer grit until the marks are smoothed out. Follow this up with polishing to restore the shine. In more severe cases, it may be necessary to reapply a topcoat to achieve a flawless finish. Remember, patience and the right techniques are key to achieving professional results.
FAQs
When Should You Sand Your Boat?
Sanding your boat is essential for surface preparation, especially before applying new paint or varnish. Ideally, you should sand your boat after a winter layup to address any rust, surface imperfections, or signs of worn finishes. For surfaces like stainless steel and softer materials, utilizing the appropriate sanding techniques and media is crucial for achieving a clean, smooth finish.
When Does Media Blasting Become More Cost-Effective Than Hand-Sanding?
Media blasting becomes more cost-effective than hand-sanding when the project is large, labor-intensive, or requires the removal of several layers of paint/antifouling. For small, detailed, or occasional work, hand-sanding remains the budget-friendly choice. The cost crossover typically occurs once the labor and time required for sanding outweigh the initial investment and setup of blasting, often at surface areas above 50~100 square feet or when project deadlines demand rapid turnaround.
How important is dust management?
Dust management is crucial for several reasons. First, it helps maintain a clean and healthy environment by reducing allergens and respiratory irritants that can affect indoor air quality. Second, effective dust control can prolong the lifespan of equipment and machinery by preventing buildup that can lead to malfunctions and fire hazards.
When to use abrasive paste?
Abrasive paste is typically used for polishing or buffing materials like wood, metals, or plastics. Use paper abrasives for initial shaping, heavy material removal, or when working on large, flat surfaces, including softer surfaces. For the best results, combine both methods: sand with paper to the desired grit, then switch to abrasive paste for the final finish.

We hope this article has helped clear the air when it comes to choosing a 3M abrasive ~ but if you still have questions, please don't hesitate to contact our product experts at (800) 426-6930, or shop our huge variety of 3M abrasive products at fisheriessupply.com today!