Guide to Restoring Gelcoat: Tips and Techniques
Key Takeaways for Gelcoat Restoration and Maintenance
- Protective Role: Gelcoat acts as a critical shield for fiberglass boats, protecting the structural integrity from UV rays and environmental contaminants.
- Oxidation Signs: Deterioration typically presents as a chalky, faded surface caused by prolonged exposure to the elements.
- The Power of Preparation: A meticulous initial wash and decontamination (using specialized hull cleaners) are essential to prevent surface debris from causing scratches during the buffing process.
- Choosing Products: Use the least aggressive product (compound vs. polish) that achieves the desired result to preserve as much of the original gelcoat thickness as possible.
- Efficiency Tools: While hand application is possible, using a rotary polisher or electric buffer significantly improves consistency and saves time on larger surfaces.
- Maintenance Frequency: To maintain a pristine appearance, most boats require a full polish and wax at least once a year.
Understanding Gelcoat and Its Role
Gelcoat serves as the outer protective layer of fiberglass boats, providing both aesthetic appeal and essential protection against the elements. It acts as a durable shield against moisture, UV rays, and environmental contaminants, thereby prolonging the lifespan of your boat's structural integrity.
Understanding the role of fiberglass gelcoat is crucial for any boat owner, as proper maintenance can prevent costly repairs down the line. Preventive care not only enhances the boat's appearance but also contributes to its resale value. Ultimately, investing time and effort into understanding and caring for your gelcoat will ensure a beautiful and well-preserved vessel for years to come.
Deterioration of Gelcoat Over Time

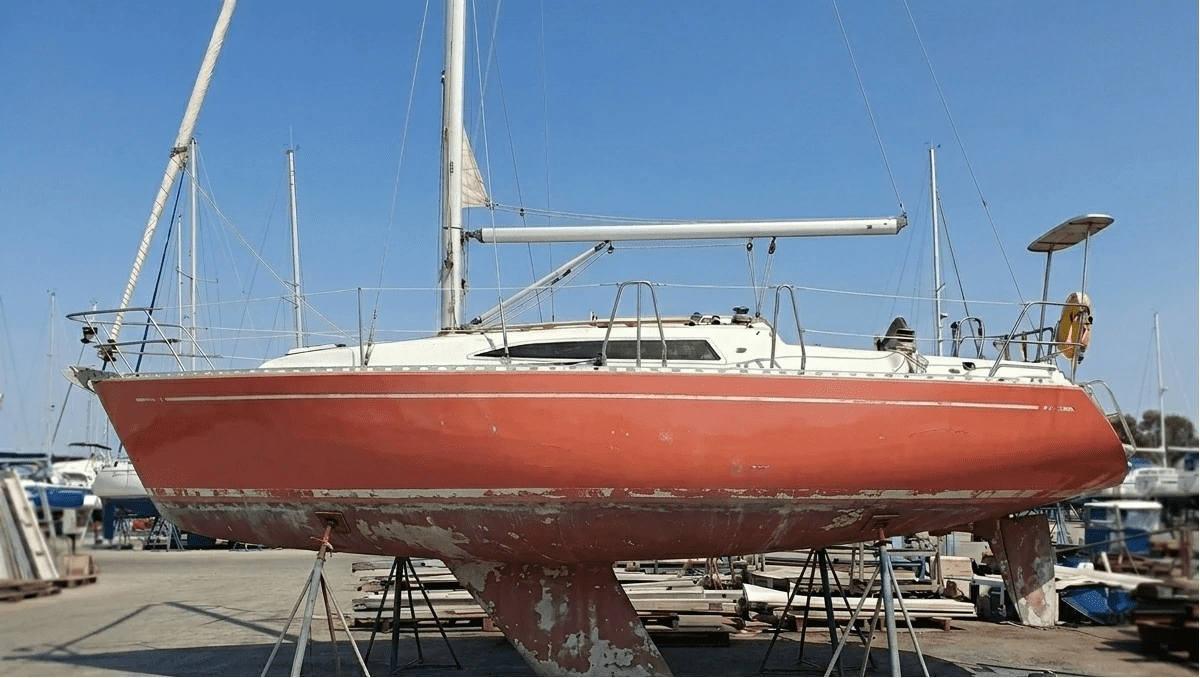
Over time, gelcoat can deteriorate due to various factors, including UV exposure, moisture, and airborne contaminants. This deterioration often manifests as fading, chalkiness, and a loss of gloss, which can affect the overall appearance of your boat. Factors such as improper cleaning methods or neglect can exacerbate the deterioration process, leading to more significant issues that require intensive restoration efforts.
To mitigate the effects of deterioration, proactive maintenance is key. Regular cleaning with marine-specific products, polishing, and applying protective wax can significantly extend the life of your gelcoat. Understanding the signs of deterioration and addressing them promptly will help preserve your boat's beauty and functionality, ensuring a rewarding boating experience.
What is Oxidation and What Causes it on Fiberglass Boats?
Oxidation on fiberglass boats is primarily characterized by a chalky appearance, resulting from prolonged exposure to UV rays, moisture, and environmental pollutants. Over time, these elements break down the gel coat, leading to a dull, porous surface that detracts from the boat's aesthetic appeal. This process can accelerate if the boat is not properly maintained, resulting in more severe damage and increased restoration efforts. Understanding the causes of oxidation is key to prevention and effective restoration; regular cleaning and protective measures can significantly extend the life of your gelcoat.
Restoring Oxidized Gelcoat

Restoring oxidized gelcoat requires a systematic approach to ensure optimal results and desired outcomes. Start by assessing the level of oxidation on your boat; this will guide you in determining the necessary steps to take. For light to moderate oxidation, a thorough wash followed by a good compounding may suffice to restore the gelcoat's shine. However, if the oxidation is severe, you may need to incorporate wet/dry sanding as an additional step.
Wet/dry sanding can be particularly effective in extreme cases where oxidation has penetrated deeply into the gelcoat. Use a fine-grit sandpaper while keeping the surface wet to minimize damage. Once you have sanded the affected areas, proceed with compounding to refine the surface and eliminate any remaining imperfections. Finally, finish the restoration process with a high-quality polish and a protective wax or sealer to lock in the shine and provide ongoing protection against the elements.
How to Prevent Oxidation in the First Place
Preventing oxidation is far more manageable than addressing it once it has set in. The first step in prevention is to establish a consistent cleaning routine. Regularly washing your boat after use helps remove contaminants, salt, and grime that can deteriorate the gelcoat over time. Utilizing marine-specific cleaning products can further protect the surface while avoiding damage that general cleaners might cause.
In addition to regular cleaning, waxing your gelcoat at least once a year is essential. The best way to provide a protective barrier against UV rays, moisture, and environmental damage is with a coat of wax. Opt for high-quality marine wax that contains UV inhibitors for maximum protection. Lastly, consider using a breathable cover when storing your boat, as this can shield it from the elements and help maintain the integrity of the gelcoat.
Cleaning and Preparing the Gelcoat Surface

Before diving into the restoration process, a meticulous cleaning and preparation of the gelcoat surface is essential. Start by removing contaminants such as dirt, rust stains, and any surface debris to avoid swirl marks during polishing. Utilizing a specialized cleaner ensures that the surface is free from residues, making it an ideal canvas for further treatment. Remember, this foundational step significantly influences the level of shine and durability achieved in subsequent stages, such as waxing and buffing, ultimately aiming for a high level of shine throughout the process.
So Many Products. Which Ones to Choose?
Each spring, our maintenance experts field a lot of questions from customers on how they can “bring back the shine” to their boat. Choosing the right products for your job is critical to making the job (relatively) easy and effective. Below we describe the differences between compounds, polishes and glazes , as well as discuss how to get that ultimate shine back while making sure your boat's gelcoat is sealed and protected for the coming season.
What is the difference between a compound, polish or glaze?
Compounds and polishes, including rubbing compounds, are very fine abrasives suspended in a liquid and are used to bring gloss or shine to a finished surface. You can think of them as a series of extremely fine “liquid sandpapers”. They are primarily used as the final steps in refurbishing aged or oxidized gelcoat or as the final steps in blending repairs with a rotary motion. All of these products effectively remove a small amount of your gel coat, so it's essential to use the least aggressive option that will still achieve the desired result.
- Compounds are used first to remove oxidation and fine sanding scratches. The heavier the oxidation, the coarser the compound needs to be to give you more “cut”.
- Polishes are used after the compound to remove the finer scratches or swirl marks left after buffing with the compound. If you only have light oxidation, you may be able to skip a compound and begin with a polish.
- Glazes are mostly used on darker colors that easily show fine scratches. They remove even the finest swirl marks and are used when you want that ultimate mirror-like finish.

The quality of the results you expect, along with the amount of time you are willing to spend, will determine how many of these steps you perform. With a reasonably well-maintained, lightly oxidized hull, you may decide that polishing is enough. For medium oxidation, you will need to use both a compound and a polish to bring back your shine. For heavy oxidation, you will likely need to start with an “extra-cut” compound, working your way to a lighter-cut compound, all the way through to a polish.
One more thing to consider...
Compounds and polishes comprise a sophisticated combination of abrasives, surface softeners, solvents, and additives – often specifically designed for use on a particular substrate. Particularly hard surfaces such as Awlgrip's 2-part polyurethane paint may require one type of compound or polish, while chaulky gelcoat will use another, so as you look through our offerings, make sure that you select compounds and polishes that are appropriate for your specific application.
Now, let's get started on the actual process of getting your shine back!
Step 1 – Compounding

Now that you've decided which compound to use – and you've purchased the appropriate compounding pad (learn more about compounding and polishing pads) – you are ready to get to work!
- As previously mentioned, your first step before compounding OR polishing is to give the boat a good wash. We cannot stress that part enough, if you don't want the grime to make new scratches as you start to buff.
- Once the boat is clean, choose your starting point and apply the compound liberally to a compounding pad. With the buffer off, use the pad to distribute and rub the product into a 2' by 2' area, working it into any fine scratch marks left by sanding or the porous surface of the oxidized gelcoat. Doing this first also makes it less likely to splatter (or “sling”) when you turn the buffer on.
Turn the buffer on (ideally at a speed between 1500 and 2000 rpm) and work the compound into the surface. Make sure to apply light pressure and do not keep the buffer in one spot for too long – keep the machine moving to avoid overheating. Work systematically in small areas and continue buffing until the shine returns and the compound is virtually all gone. As you buff, the compound's physical structure changes to become less aggressive and further refines the surface scratches as buffing progresses – so don't stop too soon.
- When done, use a dry microfiber cloth (such as 3M Scotch-Brite High Performance Cloth) or a VERY soft rag to remove any remaining residue.
- Remember that you won't achieve a high-gloss shine at this point – you're simply removing oxidation and preparing the surface for the next step.
Step 2 – Polishing

Polishing is a little different than compounding in that too much polishing can cause your gelcoat to overheat, actually dulling the shine – so don't overdo it. You'll also want to change out your compounding pad for a polishing pad – yes, they are different and this does make a difference – for more information, please read our article on buffing pads.
- Apply the polish liberally to a polishing pad and, with the buffer off, use the pad to distribute the polish over the area to be worked. Again, a typical “load” will cover about a 2' by 2' area. No need to rub it in, but it doesn't hurt to do so.
Turn the polisher on, begin polishing, and stop when a light residue of polish is still visible. Remember to work small areas with gentle pressure – keeping the buffer moving at all times, especially if you use a foam pad – which can get very hot.
- Do not let the pad dry out. If the pad starts to jitter or grab, it's time to stop.
- Always perform a final wipe using a dry microfiber cloth or a VERY soft rag to remove any remaining residue, as even the slightest polish residue can cause stains on your newly polished surface.
Step 3 - Waxing
Your final step is to apply a good layer of protective paste wax to seal and protect the finish you've just worked so hard to acquire.

There are two ways to do this – either by hand, or with a buffer. Most everyone you talk to has an opinion on which is better (kind of like talking about anchors), but both work great if done well. If you decide to apply by hand (easier with some of the thicker waxes) do so with clean rags, soft towels or a microfiber cloth. Use a cotton rag to apply the wax, let it dry to a haze, and then use a soft towel or cloth to wipe it off. Use a circular motion for both application and removal and try to use the palm of your hand – not your fingers –applying the wax with smooth, even pressure. It's important to not let your rags get too clogged up with wax – so switch to a fresh one when it feels like your current cloth is getting full of wax. As always, finish by wiping with a clean microfiber cloth.

If you prefer to use a buffer, which is easier with liquid waxes, make sure you use the appropriate foam applicator for applying the wax and apply light, even pressure – keeping the machine moving at all times to avoid overheating. You will need to apply the wax with one pad, and then switch over to a microfiber pad to remove the wax. The 3M "Hookit" system is great for easily switching back and forth. Apply the wax to a small, 2' by 2' area, let it dry to a haze, and then remove. Finish by wiping everything with a clean microfiber cloth.
It can be advantageous to combine the two methods – apply the wax with a buffer, then remove it by hand. This can save a significant amount of time and effort in the long run, while still providing you with good control over the layer of wax you apply. Different types of wax may require a specific application process, so be sure to read the label carefully and follow the directions as instructed.
When you've made it through all of these steps, not only will your boat be protected from the harsh sun and saltwater environment, it will also have that beautiful glossy finish that always makes us turn back and take one more admiring glance.
Standard Equipment Necessary for a DIY Boat Restoration Project
When it comes to restoring your boat's gelcoat, having the right equipment is crucial for achieving professional results. Below is a list of some essential items you'll need for a successful restoration:
| Item | Purpose |
|---|---|
| Soap & Water | Initial cleaning and preparation of the surface |
| Acetone | Removes contaminants, wax, and oils for better adhesion |
| Masking Tape | Protects surrounding areas and creates clean edges |
| Oxidation Remover | Removes chalky oxidation from the gelcoat |
| Power Buffer / Rotary Polisher | Efficiently removes oxidation and polishes large areas |
| Buffing Pads (Wool & Foam) | Used with compounds and polishes for surface restoration |
| Rubbing/Cutting Compound | Restores shine and removes minor scratches |
| Polish | Enhances gloss and smoothness after compounding |
| Paste Wax (Marine Grade) | Provides long-lasting UV protection and shine |
| Carnauba Wax (Liquid or Paste) | Adds extra shine and protection; applied as a final coat |
| Sandpaper (Wet/Dry, various grits) | For sanding repairs or heavily oxidized areas (e.g., 220–1200 grit) |
| Handheld Grinder or Dremel Tool | Prepares damaged areas for repair (if needed) |
| Gelcoat Repair Kit (Resin, Catalyst, Color Match) | For filling chips, cracks, or deep scratches |
| Mixing Cups & Stir Sticks | For accurate mixing of gelcoat and catalyst |
| Putty Knife or Applicator | For applying gelcoat paste to damaged areas |
| Latex Gloves | Protects hands from chemicals |
| Goggles | Protects eyes from dust and chemicals |
By having the right tools, you'll not only make the restoration process easier but also enhance the quality of your results. Remember, investing in quality equipment pays off in the long run.
Frequently Asked Questions
What common mistakes should be avoided when restoring gelcoat?
When restoring gel coat, avoid these common mistakes: skipping surface preparation, applying too thick a layer, and using improper tools. Additionally, avoid rushing the curing process or disregarding safety precautions. Taking the time to follow best practices ensures the best results, with a smooth, long-lasting finish on the surface of the gelcoat.
Should I Use Gelcoat Restorer?
Using a gelcoat restorer can be an effective solution for rejuvenating the appearance of your boat's gelcoat, especially on the topsides. When deciding whether to use a gelcoat restorer, consider the condition of your gelcoat. If the surface is only mildly oxidized or showing light wear, a restorer can be an excellent option. For more severe degradation or heavy oxidation, it may still be necessary to follow the traditional restoration steps of compounding and polishing before applying a sealer or restorer for optimal results.
Do I Really Need an Electric Buffer?
While not strictly necessary, an electric buffer significantly simplifies the process of restoring gelcoat. It provides consistent speed and pressure, ensuring a smoother finish. For larger surfaces or frequent projects, investing in an electric buffer can save time and effort.
How Often Should I Polish My Boat?
The frequency of polishing your boat largely depends on its exposure to the elements and your specific maintenance routine. Some people obsessively polish their boat every three to six months to maintain its pristine appearance. Most boaters generally polish or wax their boat once a year, at the beginning of the boating season. In areas with intense sunlight or harsh marine environments, more frequent wax coating and polishing may be necessary.

We hope you've found this article informative – but if you've additional questions, please don't hesitate to contact our product experts at (800) 426-6930.